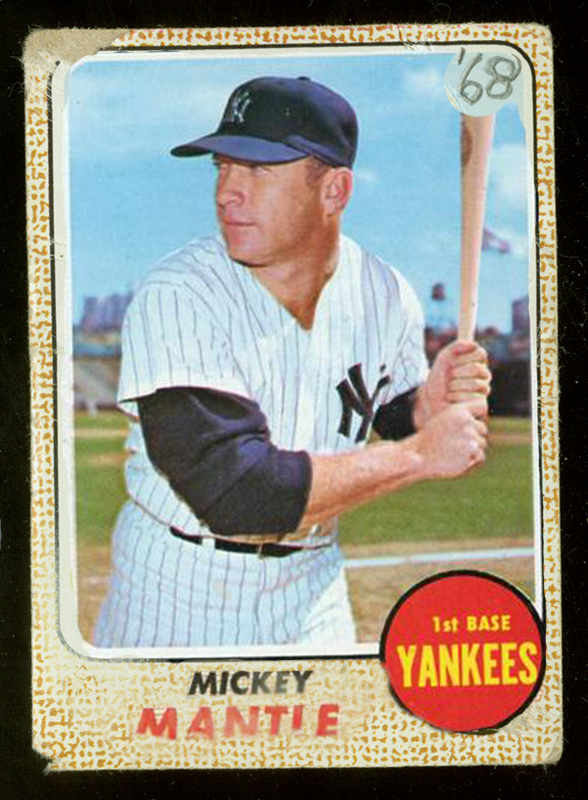
Before
|
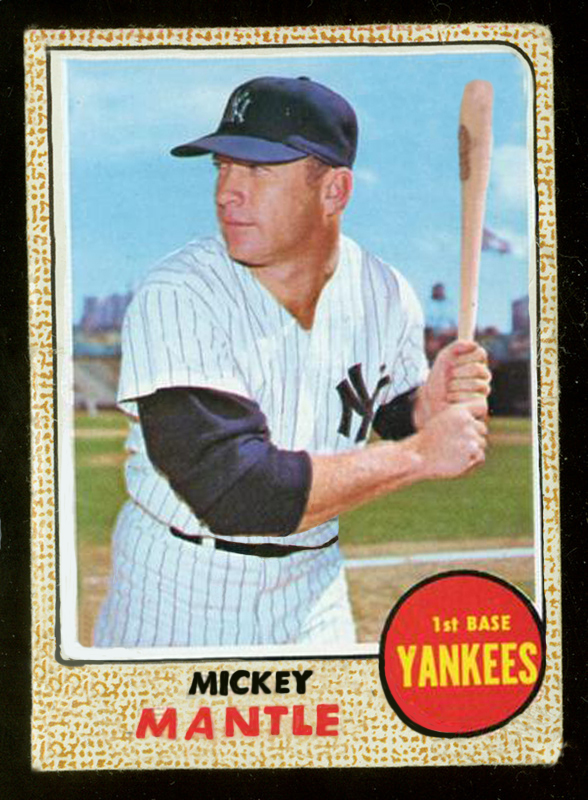
After
|
In Digital photo I had to reconstruct this 'Mickey Mantle' Baseball Card. I used the cloning tool to clone the background repeating pattern and also for the bat which was written over with pencil. I then used the paint brush with a low opacity to re-paint over the letters since they were fading. I also had to fill in the red in the circle and clone the black outer ring around the rest of the circle.
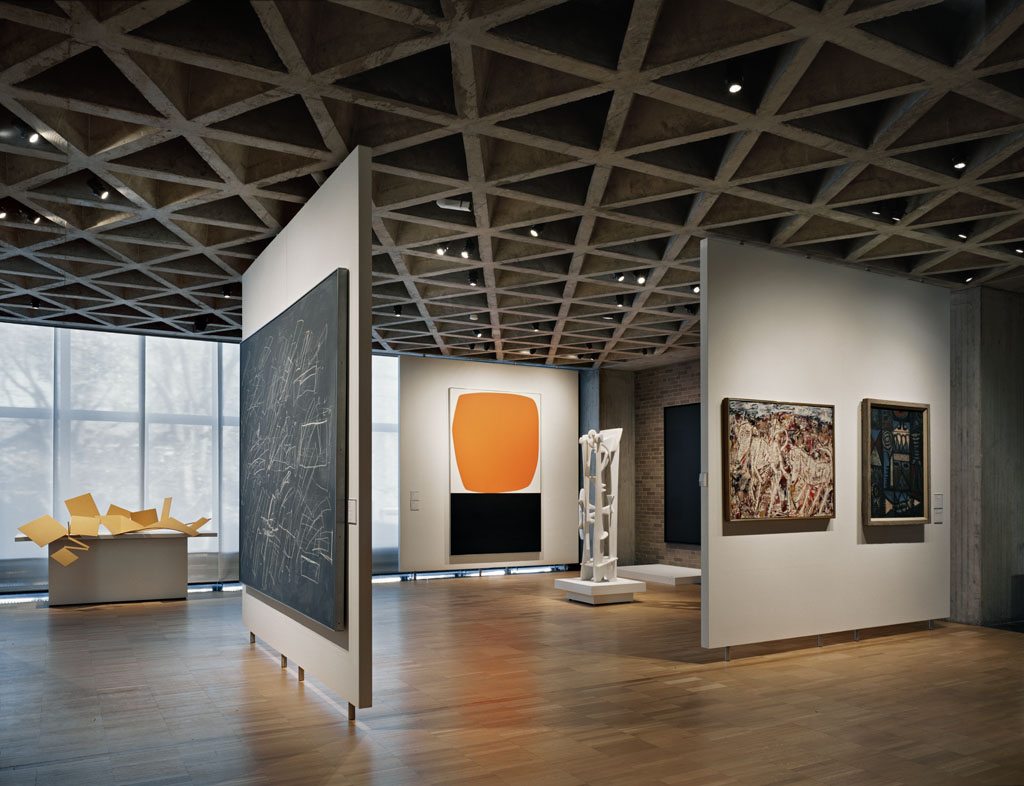
Before
|
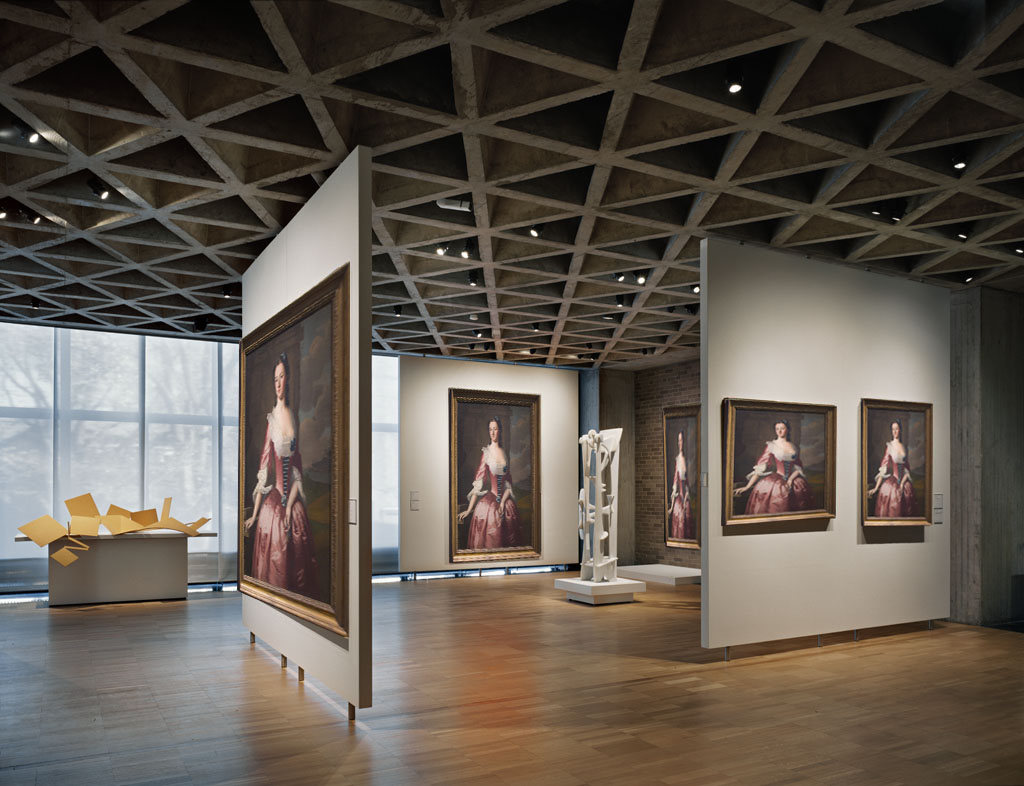
After
|
In this project I had to Distort this painting to make it fit all the different references in the Gallery. By Distorting the Pictures it made it look like you could see all the pictures from one point of view without moving.
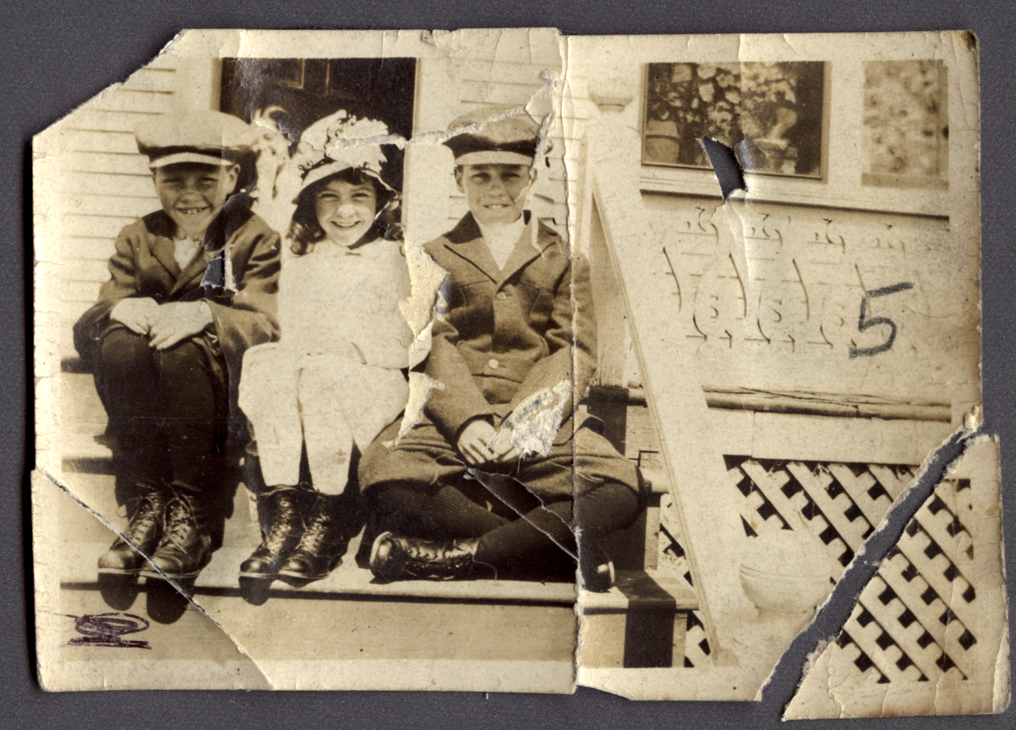
Before
|
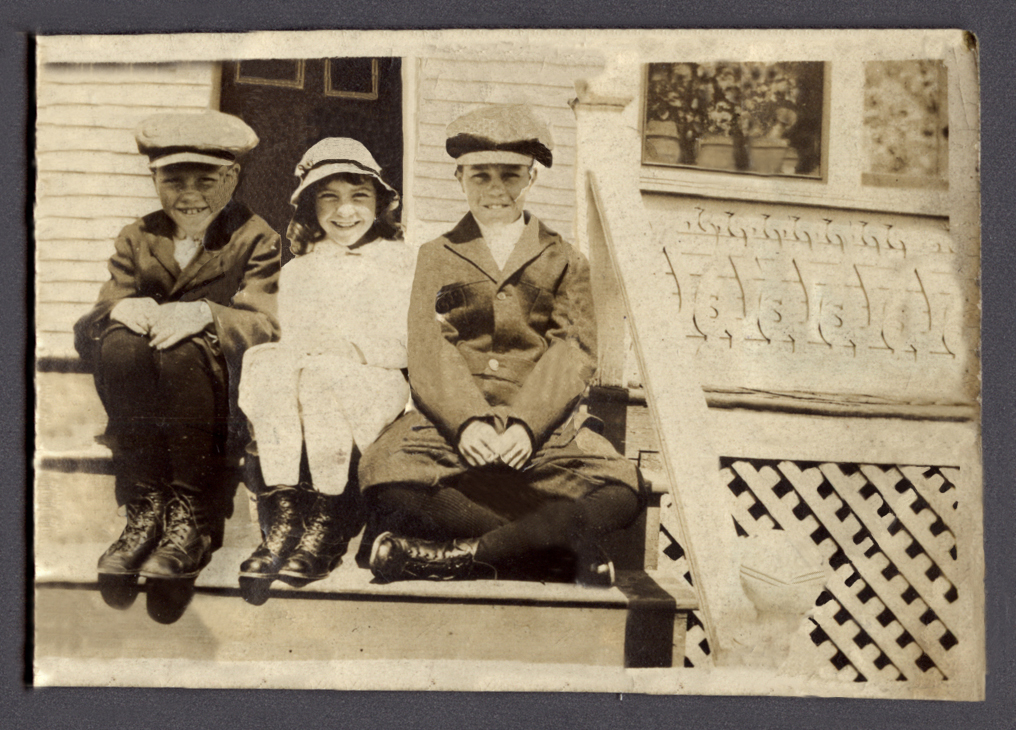
After
|
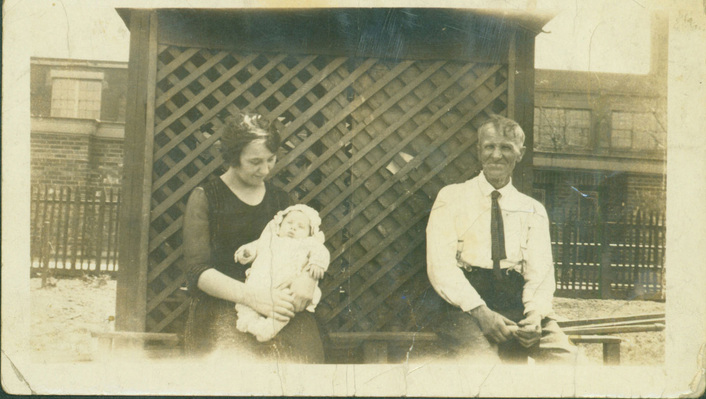
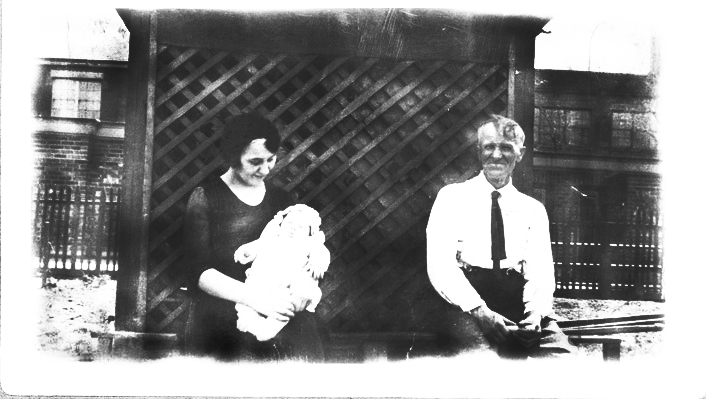
Given this old picture to 'fix' I used the cloning stamp, elastic tool and the copy and paste setting. For the fence I had to copy the detached part of the fence and make it into a different layer in order to move it over to line it up correctly. I also did the same thing on the right elbow hand part on the boy on the right. All the rest i used the cloning tool to fill in the missing parts of the picture.
When given this old photo to fix I had to search for something that she might of been wearing because I couldn't tell exactly what she was wearing at that time. So I looked for a wool drench coat that would fit the area that the picture might of been taken in. After finding a suitable coat I had to reconstruct her face because her china and her side of her face was also missing. Soon after completing the main problems I went ahead and touched up the backround filling in missing holes and starched that were made in the photo. Eventually believe it or not I was done with the project, but I had one last thing to do- I had to add color to the black and white picture. I choose these colors because you can never go wrong with yellow and navy blue back then. Throughout this whole process I used photoshop and multiple tools that helped reconstruct this photo.

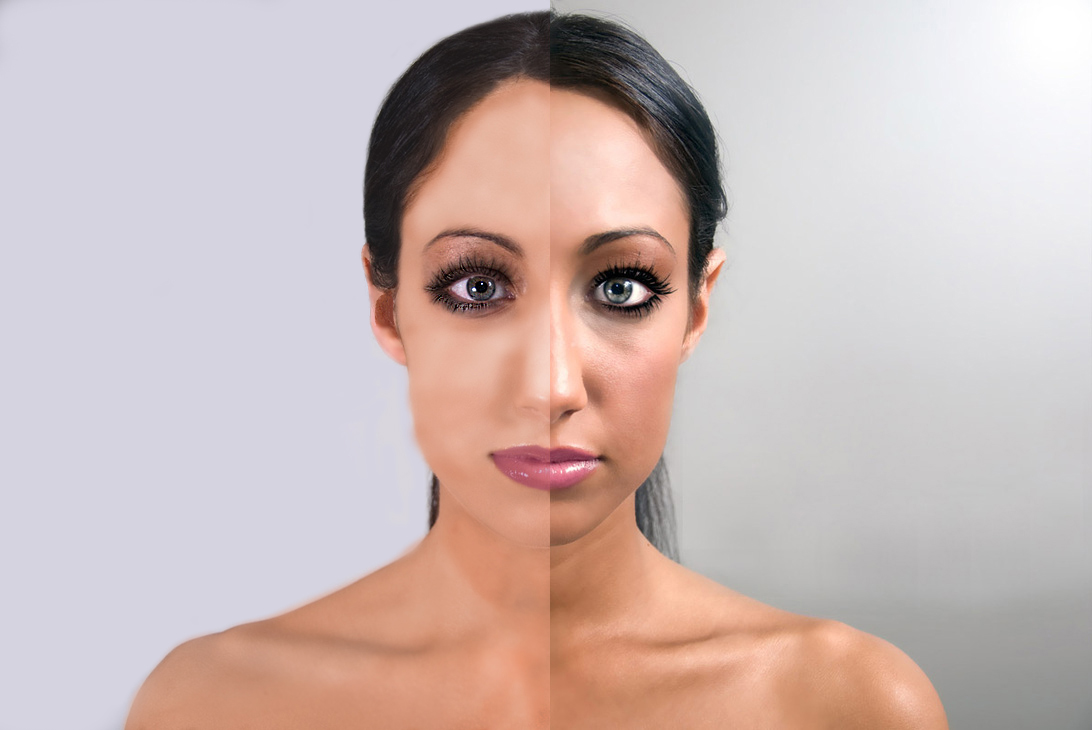
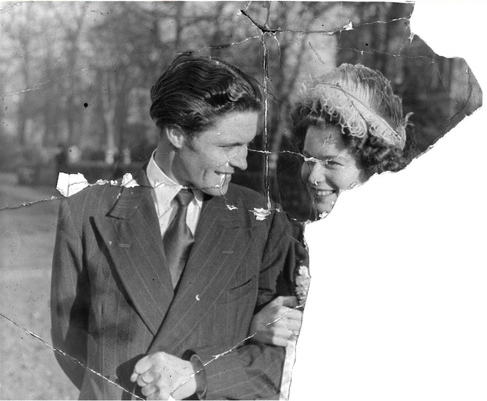
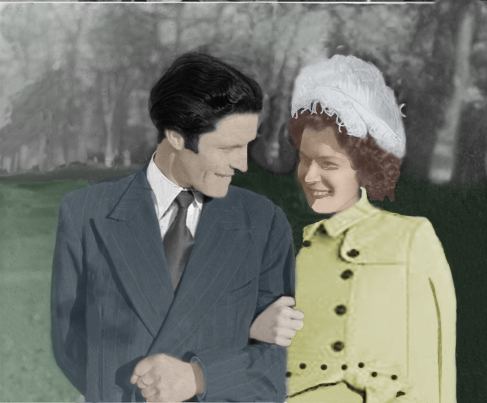
For this project I had to make the left side of her face look like the right side. I used the burn tool, dodge tool, color balance, and brightness and contrast. I also painted in more eyelashes to make them look more bold looking. In order for me to make the skin lighter I had to play around with multiple different tones to make one to make one tone that was relevantly similar to the original. The eye part would most likely of been the hardest part of me.
In oder to fix the image I used the burn tool, the dodge tool, brightness and contrast, and I also changed the color balance. I made the picture darker in areas and made some of the areas lighter were I thought that it should be lighter. I also used the clone stamp to fill in the ladies hair. I also used the clone stamp to fill in the missing pieces of the fence it make it look real.
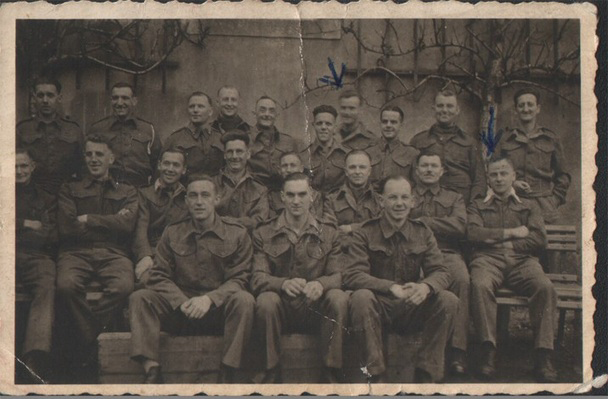
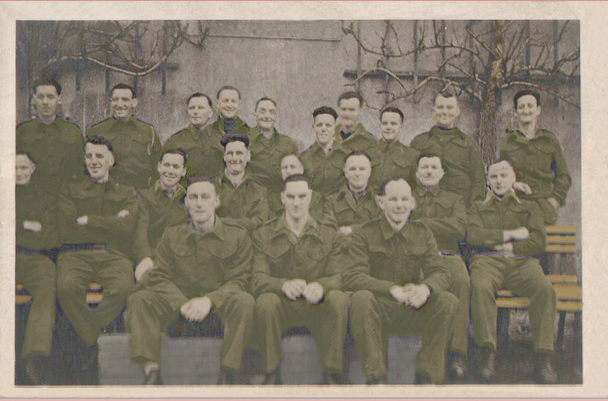
For this project I used the eraser, paint, and clone stamp in order to improve this picture. I used the paint tool to color the jackets, the benches, and the back wall. I also had to change the tone of their skin using the color balance. I also used the dodge tool to darken some areas within the picture. I used the eraser to erase the pen marks that were on the upper part of the photo. In order to make it brighter I changed the brightness and enhanced the color contrast to make the people pop.
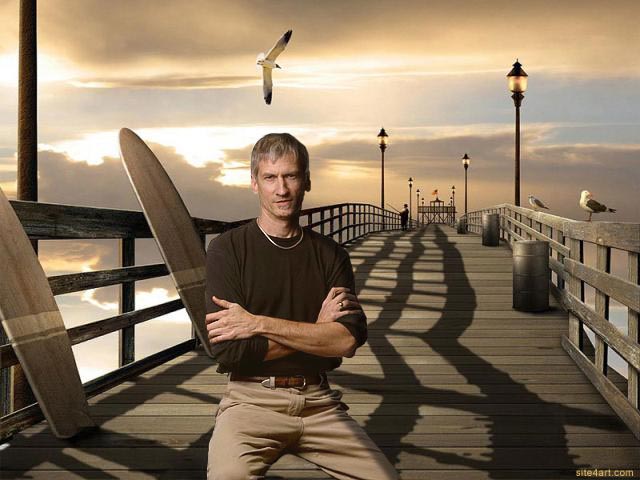
For this project I had combine two photos in order to make one. I used the magnetic lasso tool to remove the man from one picture to add it to the other. In order to make him look like he was part of the photo I had to change the rotation of him and add a shadow that made him look like he was sitting in the same frame. I used the burn and dodge tool in some areas to make the picture look more contrasted. I also used the sharpen tool to highlight the sun rays coming out of the clouds.
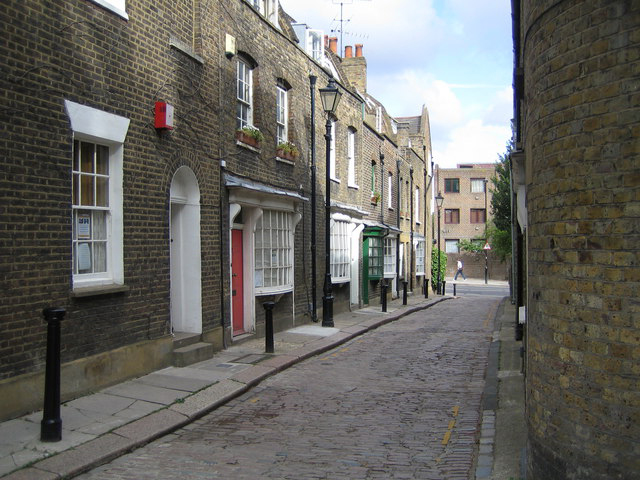
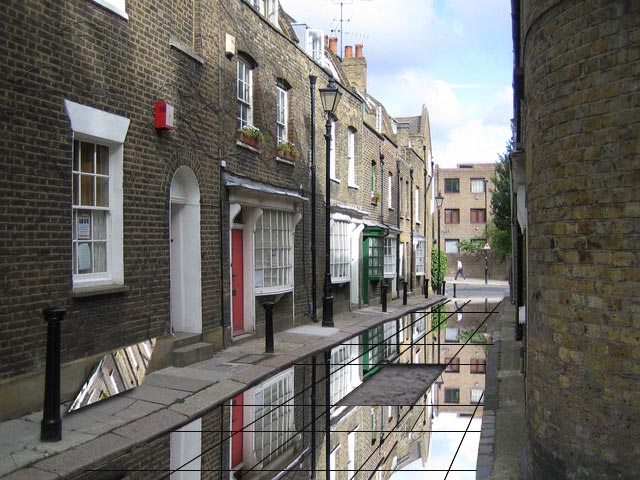
For this pictured I used many tools such as scew, reflection, lasso, line tool, and many more. I had to mirror the far wall of the picture in order to copy and move it into the street to give it that reflection effect. after I placed the image into the street I made lines coming out of a vantage point to make it look like it was coming out from one point. To go beyond just making it look like a reflection I removed a square to reveal the under layer showing the actual street. On the square that I removed I placed a shadow under it to make it look like it was sitting up against the wall.
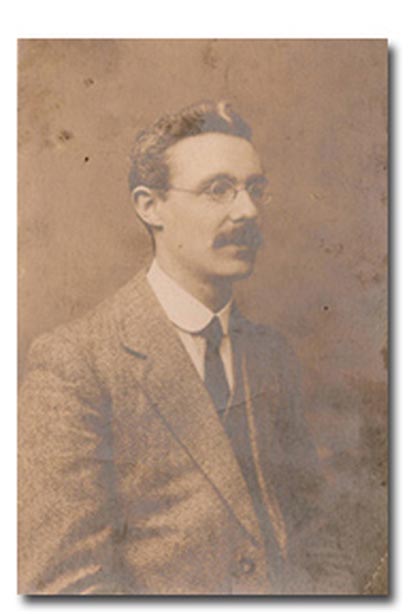
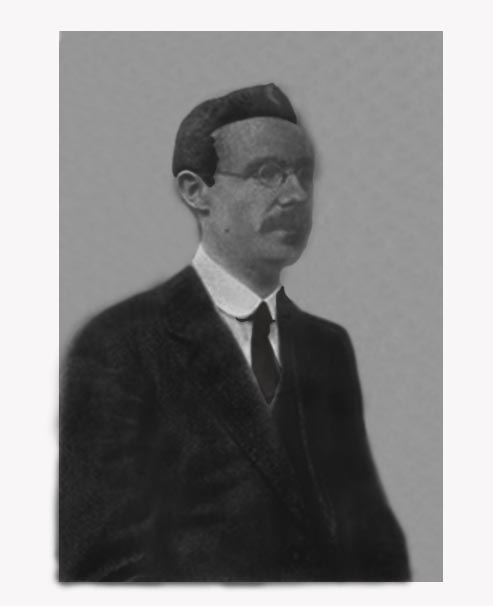
For this man I had to make the picture less blurry and make the pixels more sharp. I used the sharp too to advance the outer part of the jacket and and bottom half of his torso. I used the paint tool to paint in the tie and the little parts of the white shirt showing from the jacket to give it a little more color. I also made the background grey because having a brown background would make the picture look dull and less noticeable. Also I sharpened the whites strip in his hair to give it more color since it was the only thing standing out towards the top of the picture.
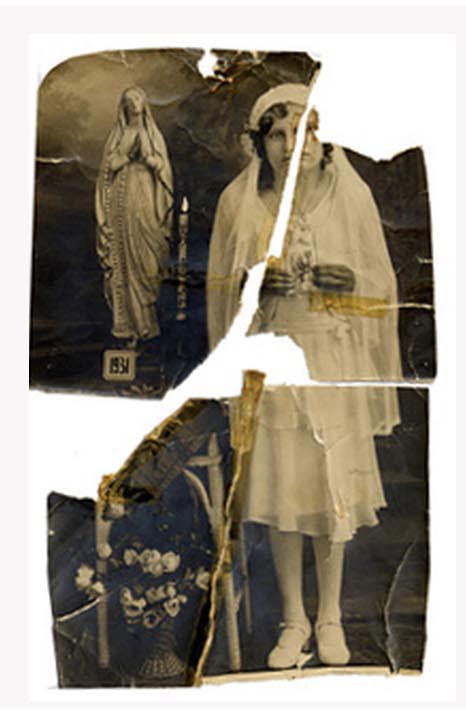
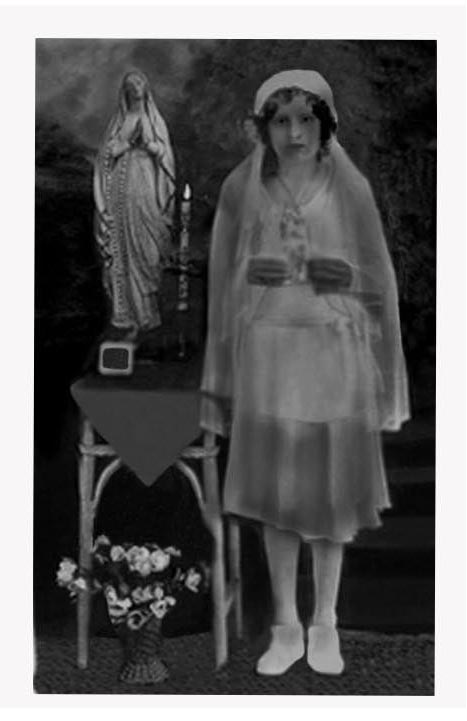
For this photo I used the cloning stamp, pattern tool, erase tool, drawing/painting tool. I had to draw in the missing half of the table and color in her missing parts of her dress. I cloned stamp the outer ring of the photo to fill in the missing chunks and also to get rid of the wrinkles. I also added more pieces of the floor into the photo because there was minimal floor to begin with. Also I created more flowers on the outer brinks of the vase because some of the flowers were in no condition to be salvaged. I also copied her eye and transformed it to fit her right side of her face because her eye was torn out. I also changed it to Black and White for a more dramatic effect.
